Table of Contents
This is an old revision of the document!
911 Turbo - Exhaust Removal & Replacement
I had upgraded most (but not all) of the exhaust system around 2010 by fitting a Fabspeed decat pipe and a seat of GSF heat exchangers (which also involved refitting a back-dated 930 Turbo oil return pipe under the crankcase, rather than the 964 Turbo pipe which interferes with the placement of the join between the two cylinder banks on the aftermarket system).
I kept the standard exhaust silencer in the rear wheel arch and standard exhaust tips and the factory wastegate pipework.
Some time around 2011 after replacing most of the leaking oil pipes I decided to take the system off and replace a number of seals and gaskets that had started to show signs of leaking (carbon soot around several joints in the exhaust system), as well as replace the factory exhaust tips.
After more than 10 years, the GSF system (which was by far the cheapest stainless system on the market at that point in time) was still looking in pretty good condition.
Removing Exhaust & Rear Bumper
Initial Prep
The exhaust has been on a car for around 10 years, so there's no chance it would all come off nicely - so I decided to spend a week or two spraying all of the nuts and bolts with penetrating fluid to reduce the risk of anything snapping….
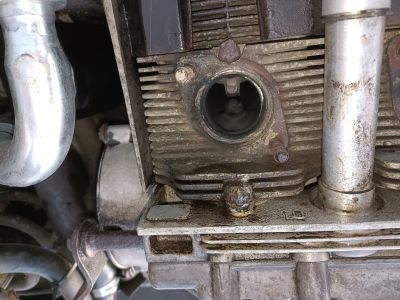
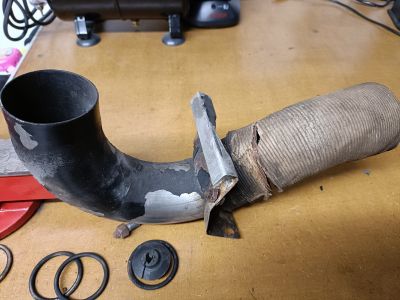
Never saw this before, but with the camera flash on, it's clear that the wastegate exhaust pipe is blowing from just above the flange. So that's another thing that will need replacement (and probably some new studs too, since they have corroded to almost nothing)….
I knew this was going to be messy, so put a tray on the floor under the engine to catch all the leaks of oil and penetrating fluid dripping off that would inevitably happen!
Bumper
Before starting to remove the exhaust itself, I also removed the rear bumper to give better access. That alone raised another set of parts that needed repair or replacement, with the bumper support brackets being very rusty and also exposing very rusted engine tinware.
Firstly, remove the tail lights and centre section (make sure you disconnect all of the wires which run to the number plate light and the breather tubes and grommet which push through the rear of the right hand tail-light recess):
Then remove the inner wheel arch plastic liners. These are asymmetric, with the right hand liner being a single (short) piece covering just the rear of the wheel well (a seperate liner covers the oil tank), and the left hand liner extending partially over the top of the arch. These of course are specific to the Turbo/widebody cars, so if snapped/broken/missing, are going to be expensive/tricky to track down.
This is where the first problems arose - a number of the screws holding the arch liners to the bumper/bumper supports were rusted solid and needed drilling out… not until my impact punch snapped a bit!:
Bumper Supports
Then, with the wheel arch liners removed, I had several wing/bumper supports looking back at me in fairly rusty condition:
I think that the rear bumper support brackets will probably remove and clean up okay, after a bit of wire-wheel action, but I'm more concerned about the wheel arch support (“Support tube”, 965.559.271.01, according to the manual) in the left hand arch; it's pretty bad.
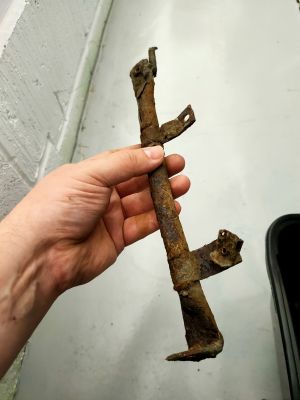
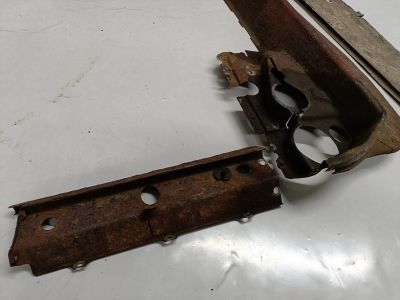
Next up is removing the two 'S' shaped bumper reinforcing strips from each wheel arch. Again, these are specific to the Turbo/widebody cars due to the extra width of the arches and the shape of the rear bumper. The screws (3 each side) go up from underneath these strips into speed clips fastened to the rear quarters. On mine, there was almost nothing left of the heads of these screws, and it took quite a bit of messing about to get all 6 of the screws out. Even in the images above you can see those reinforcing strips are rusty, but just look at the state of them off the car:
Those will both have to be replaced.
Blower Motors, Pipework
Now it's on to removing the rest of the parts on the right side of the car to make access easier and to allow for replacement/refurbishment of those corroded bits as needed.
First the blower motor up inside the rear quarter needs to be unbolted, to allow the bumper support bars to be taken off:
The bumper support bars are two pieces, but in my case the screws which hold the heatshield material to it have rusted solid, so I needed to take both the front and rear bars off. The front bar is already loose, following the above stages, but the rear bar is obstructed by a number of bolts in and around the bumper mounting bracket - they need to be removed first, as well as a short strengthening bar which runs from the chassis rail to the mounting bracket:
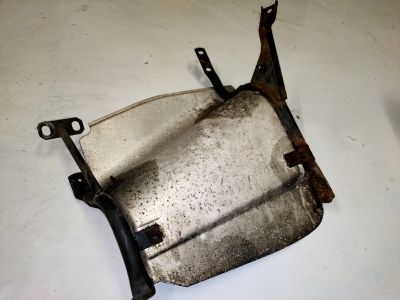
Once that's off, and the remaining bolts out, the bumper supports and the heatshield come out:
Here's a look at the pieces off the car, and the extent of the rust:
Taking Stock of Parts Condition
With the parts off the car, I actually don't think any of them need replacing - the bumper support bar/heatshield is by far the worst, but it doesn't appear to be a compromised structurally. With the heatshield material removed, I think a good clear with a wire brush and wire wheel, then some rust preventative and paint will have it looking almost as good as new. The rest of the parts have very minor surface rust that should clean easily.
The left hand wheel arch is mostly the same as the right, but there are less complications due to not having the rear exhaust box in the way. It's mainly the same process as above, and virtually the same condition. One exception I noticed while doing the initial removal of the arch liners was the state of the shark fin support bar. I began disassembly of it, and it came off rather easily… too easily:
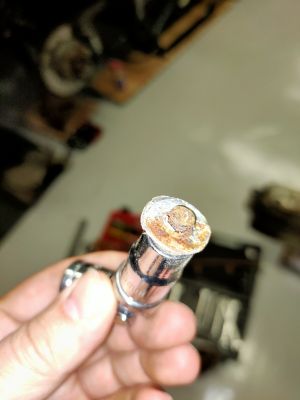
Yep, the captive stud on the inside of the arch simply turned and snapped. Looking at how much rust there is on the shank of it, left embedded in the nut, it appears to have been holding on with just a millimetre or so (it was probably just the rust holding it on!). The support bar itself is absolutely rotten; there's no chance of saving it.
I'm not getting to spot welding a new stud onto the arch, so this will have to be cleaned up and a new stud attached on the back of the arch with epoxy resign or something similar. The support bar itself is also an astonishing £190 plus VAT! All for a 20cm pipe with a flange either end and two tabs for the screws for the arch liner. I think a DIY replacement can be made for less than £5!
Final Wheelarch Parts Removal
With all of the brackets, parts and hoses removed from under each arch/rear quarter, they end up looking like this:
Both blower motors need a good clean and the the metal parts painting to prevent any further corrosion. But both are complete, without any damage, which is good:
Meanwhile, my dad managed to weld up a replacement to the rotten support bar, so that's one part solved without having to pay Porsche taxes:
Next is the removal of the exhaust system itself.
Removing Wastegate
The wastegate was relatively easy to remove, since it had previously been removed and refitted when the exhaust system was replaced around ten years ago. The four nuts and washers mounting it to the exhaust flange were all in good condition and needed little more than a squirt of penetrating fluid, coming straight off without any drama:
With the wastegate (and wastegate cat pipe) off the car and mounted on the workbench, first job was to get the corroded nuts off the cat mounting flange. Again, no chance of these coming off nicely - far, far too gone for that. Instead they just had to be cut off:
So did the cat pipe then come off? Ha! No chance…
The rusted out studs had fully lodged in the holes of the mounting flange, and I ended up having to cut down the corners around the studs and lever the two mounting faces apart. The gasket had also cooked itself into the flanges, so also wasn't helping matters. Fortunately it eventually came apart without any real damage to the wastegate itself.
All eight original studs will have to be removed as even the ones which didn't need cutting are well and truly worn out - every single one has several worn or corroded threads.
With the cat pipe removed, the spacer plate came off and it was easy to see that the valve was not overly worn or damaged, and there seemed to be no excess float or play in the valve stem:
Next up is removing the retaining nuts for the alloy top cover, so that the unit can be split and the original diaphragm and wastegate spring (0.7-0.8bar rated) can be replaced with the new parts.
Stud condition
Removing Headers
Right Bank
The right exhaust headers were removed very easily - most of the studs had been replaced when the system was originally fitted, and that, along with all the new bolts that had been used, meant they all loosened without any drama.
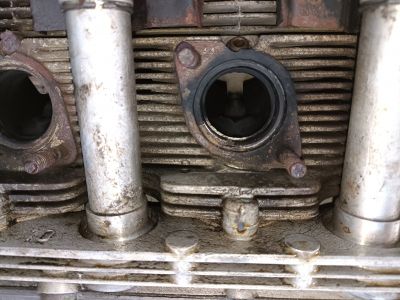
This was the bank that I thought had been leaking from around the exhaust ports, and with the header off the car it's clear to see where it has been coming from:
Cylinder #6 - not a lot of soot around the exhaust port, looks like it has been sealed relatively well, very slight leak at the 7-10 o'clock position. Sealing ring is intact, but with some crusty deposits around the flange:
Cylinder #5 - significant evidence of an exhaust leak around the port on the flange mounting faces from approx 9-3 o'clock. A lot of carbonised deposits around the sealing ring :
Cylinder #4 - a larger leak that is also seen as sooty deposits on the cooling fins of the cylinder barrels themselves. Leaking from 7-1 o'clock position. Sealing ring is relatively clean:
Looking at all three ports (from left to right: #6, #5, #4):
Left bank
Although the flanges on the left bank; cylinders 1, 2 and 3, all show soot, they seem much more even than the right bank. With any luck, a better fitting exhaust seal ring and a good clean up will get these fitting better.
Cylinder #1
Cylinder #2
Cylinder #3
Looking at the three cylinders, from left to right; 1, 2 and 3:
General condition of the exhaust system is still very good - a few oil stains here and there, from the recent oil pipework replacement, as well as all of the release oil I've been using. A good clean up is needed, but there's no corrosion and no cracks from what I can see.
I also took the opportunity to pop off the intake hose from the turbo and check for wear or damage; fortunately it is in exceedingly good condition for an original, 1992 turbocharger - no side to side or in/out float at all, the shaft also spins extremely freely, even taking a good second or two to spin down after spinning it gently by hand. The shaft and bearing surfaces must be in very good condition. Also no oil drips in the intake elbow, so crankcase pressure/seals would also appear to be good.
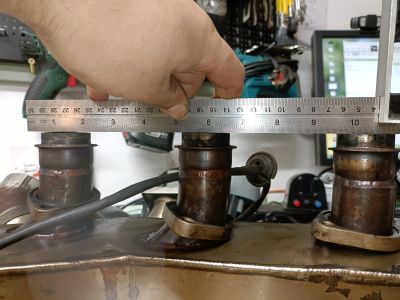
One thing that was bugging me was why the significant exhaust leak. With both headers off I lifted them up on the bench and tested for levels across each of the three exhaust flanges… what I found is probably the most likely cause of the leak:
The left hand bank shows that cylinder 2 exhaust flange sits around 1mm lower in height than the outer two flanges (1 and 3), and the right hand bank shows that cylinder 5 sits around 1mm higher than the outer two flanges (4 and 6) on that bank. It's not a lot, but since these aircooled turbos only use a basic sealing ring / crush washer to seal against the head….
…. then that's probably enough discrepancy in tolerance to have all of the exhaust flanges not mate to the head properly. The only way to resolve this is to take a file to the flanges and file them down so that the straight edge sits perfectly on them all.
Removing Engine Tinware
Not strictly necessary, but since everything else around the exhaust is coming off, it made sense to strip these rusty parts off while access is easy(er).
In order, it seemed easiest to remove the right and left side pieces first, then you get a (little bit) better access to the remaining corner screws of the rear engine tin. Obviously with the engine still in the car I did not look to remove the other pieces of tinware which are on the front/gearbox side of the engine.
Clearly, very, very rusty. But fortunately there are no holes - only certain of these pieces seem to be available from new (at least in 2022), so if you had to replace them all it would either be very expensive, or rather difficult to track down old stock. I'll be media blasting them and repainting before refitting.
With the engine tin out, there's much better access to the upper (inlet) valve/spark plug area, so it makes sense to change plugs, replace cam cover gaskets and do any valve adjustments at the same time. In my case I've got a bit of a leak from the right hand, lower cover, so I'll be replacing all gaskets, checking valves and repainting the covers before I refit them.
Removing Catalytic Converter / Turbo
Replacing Gaskets & Seals
Oil Return Replacement
New Wastegate Pipe
New Exhaust Tips
Parts
| Part | Part Number | Supplier | Total Cost | Notes |
|---|---|---|---|---|
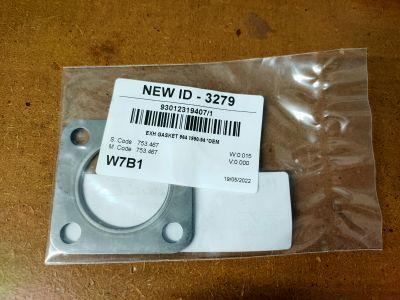
| Turbo to exhaust gasket | 930 123 192 05 | Design 911 | £16 | Fits between exhaust system and inlet to turbocharger. x1 |
| Wastegate gasket | 930 123 194 07 | Design 911 | £17 | Fits between exhaust system and external wastegate, and between wastegate and tailpipe. x2 |
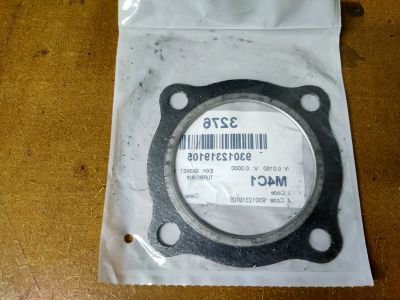
| Turbo to cat gasket | 930 123 191 05 | Design 911 | £26 | Fits between turbocharger outlet and support bracket, and support bracket to catalytic converter. x2 |
| Heat exchanger lock nuts | 999 084 625 02 | Spalding Fasteners | M8 lock nuts. x12 | |
| Wastegate lock nuts | 900 910 097 02 | Spalding Fasteners | M8 lock nuts. x8 | |
| Wastegate studs | 900 081 048 02 | Spalding Fasteners | M8x25 studs. x4 | |
| Wastegate studs | 900 081 049 02 | Spalding Fasteners | M8x32 studs. x4 | |
| Turbocharger bolts | 900 074 284 02 | Spalding Fasteners | M10x40 bolt. x4 | |
| Turbocharger lock nuts | 900 910 099 02 | Spalding Fasteners | M10 lock nuts. x4. Also replaces x1 of 930 123 114 02. | |
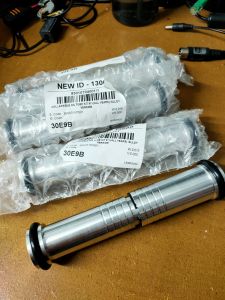
| Oil return tubes | 930 107 040 01 | Design 911 | £130 | Set of 4 collapsible alloy oil-return tubes. |
| Cargraphic wastegate pipe | 930 123 064 01 | Cargraphic | £360 | Replaced standard part with Cargraphic part P65WGS - straight through wastegate catalytic converter. Cargraphic don't appear to have a direct sales method, so I had to order this through Jasmine Porschalink. |
| Fabspeed exhaust tips | 930 111 252 01 & 930 111 251 03 | Design 911 | £321 | Replaces standard exhaust tips with larger, stainless oval tips. Fabspeed part FS.POR.964T.OTP. |
| Wastegate spring | FVD | £110 | Replaces standard 0.7bar wastegate spring with 0.9-1.0bar spring. FVD part number FVD 123 110. | |
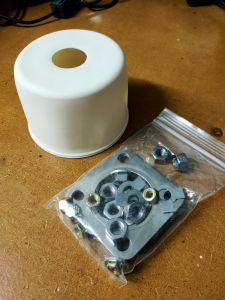
| Wastegate service kit | FVD | £151 | New wastegate diaphragm, nuts and washers. FVD part number FVD 123 930 00. | |
| Rear bumper attachment strip(s) | 965 505 443 00 & 965 505 444 00 | £30 | Replace the original rusted parts. Supports bumper to rear quarter panel fasteners. x2 (distinct parts, left & right) | |
| Sharks fin support tube (left) | 965 559 271 00 | Replace the front support tube in the left hand wheel arch. Right hand not corroded (behind oil tank). |


